Mausoleum
Administration
Starting the Administration Client
The administration of mausoleum is done via the normal Mausoleum client. Administration mode is recognized by the specialized login. After downloading the files “Mausoleum.jar” and “mausoleum.key” to a directory on the client machine you invoke the client by double clicking the “Mausoleum.jar” file. If the client doesn’t start make sure that
- The server is up and running
- The “mausoleum.key” file is present in the dircetory from which you started the client
- Java is properly installed on the Client computer.
You should get this dialog:
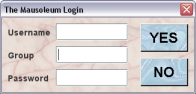
You enter the Admistrator credentials:
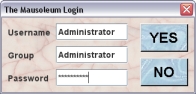
Username and Group is always “Administrator”. After successful login you get the Administrator client:

In the Object browser in the tab "Objects" you can look into the objects in the database. The current version does not allow direct editing of items in th database but will just show how the items are interconnected and organized. The tab "Log files" gives you the log files. In case you are not accessing files on the server it can be convenient to access log files from within the administrator mode.
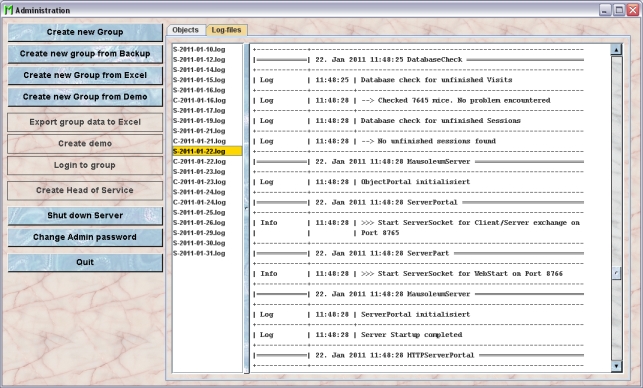
The buttons on the left hand side invoke the various operations for the administration of your Mausole installation.
Setting up a new Group
To have a manageable size to work with when you log in and to limit access mausoleum uses groups to define which mice can be seen and manipulated. One user can be part of several groups but can only access one group at a time. If agreed beforehand Mausoleum may be delivered with groups and users preinstalled.
In order to setup new groups, login as "Administrator". You click the Button “New Group”. You will be asked for the group’s name.
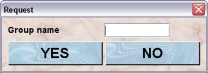
Make sure that the name for the new group is not already taken by an existing group. Then you will be asked for the name of the guru (e. g. "Smith") in this group. This name must contain at least four letters.
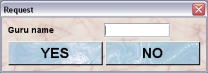
The password of the guru will be initially identical to the name. It can be changed afterwards. After a last security dialog the new group will be created.
Create a new group from a backup file
Data can be imported from a backup file. This is useful if a group moves from to a new server installation or if severe problems have occurred (e. g. file system crash). Mausoleum creates daily copies of the database on the server machine as zip files. It is wise to make backups of these and store in a separate volume.
If you want to replace the data from a group you will first shutdown the server process and then delete the directory of this group in the dirctory “files/server”. But be aware that this step destroys all the data of this group.
Befor you start the import be sure that you copied the backup file to a directory you have acces to from the client computer. To start the import process you click the button “Create new group from backup”. If you import a backup file, all data are taken from this datafile except the group name. So you have to specify the name of the group.
Make sure that the name for the new group is not already taken by an existing group. Then you have to select a backup file. After you have selected the backup file the data are imported. After successful import you see this dialog:
Create a new group from a excel file
You can also create a new group from an Excel file which was previously exported using the Administration Client from Mausoleum. Please be very careful if you manipulate the Excel file before importing the data. Mausoleum will not guarantee the consistence of the data if they were imported from a modified Excel file.
First you will be asked for the name of the group:
Make sure that the name for the new group is not already taken by an existing group.Then you have to specify the Excel-file which should be imported. After successful import you see this dialog:
Create a new group from a demo database
It is quite convenient to start exploring Mausoleum with the demo version. You can also work with your real data if you use the "tester2" group of the demo which is initially totally empty. Later if you bought the full version you might want to import your data from the demo version into your real database. To do this you click the button "Create new group from demo". In the upcoming dialog you have to specify the diretory of the group you want to import. You find this directory with the name of the group in your demo folder in "files/server". Usually this will be "[MAUSOLEUM]/files/server/tester2". Take care choosing the right directory. Then you will be aske dfor the name of the group:
Make sure that the name for the new group is not already taken by an existing group. After a while which is needed to setup the new group you will be informed that the new group was created:
Export data to Excel
You can export all the information of a specific group to an Excel file which you can use for other purposes whatsoiever. In order to do so you select the group of interest and click the button "Export group data to Excel". After a while which is needed to provide the data on the server you will be asked for the location where the Excel (".xls") file should be stored.
Creating a demo with data from a group
In case a new member joins your lab it could be a wise decision to let this person first play around with the Mausoleum before working with the real data. Of course you could use the official demo from the website. But this demo will not contain the data from your group. If you want to create a special demo version which contains all the data from a specific group you select the group for which you want to create the demo and click the button "Create demo". After a while you will be asked for a location for the zip-file which was created on the server. After the zip-file was sucessfully stored on your computer you porceed the same way as you do with the official demo. You unzip the package at a location (maybe even a USB-stick) where you want to train the respective person. For this special demo the same restrictions apply as fopr the official demo version. It runs only on one computer, there is no support for a client server mode and only one user can login at a time.
Logging into a group
If it is necessary the administrator may log in a group. Therefore perfrom these steps
- Select a group in the list
- Click the button "Login to group"
- You will be automatically logged in as the GURU of the group. In case there are several GURUs, you will be logged as the first in alphabetical order.
Creating a head of service user
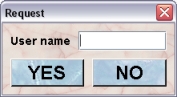
Starting with Mausoleum 5.0 there is a special group (the "Service group") which is responsible for the administrtation of resources such as racks and rooms which are shared between different groups. This group will be created automatically but in the beginnig this group is completely enpty. In order to use this group the "head of service" user has to be crreated. You select the service group in the groups list and click on the button "Create Head of Service". You will be asked for the name of the user
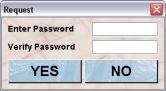
Then you have to provide the password for this user:

By confirming this dialog with "YES" you let Mausoleum create this user.
Shutting down the server process
Shutting down the server is important for instance if a new server program version has to be installed. In order to shutdown the server process you click the button “Shut down server”. The server process will be halted and has to be started again by invoking the respective start command.
Changing the administrator password
The default password for the Mausoleum administration client is “MausoAdmin”. It can be changed permanently. Therefore you click the button “Change Admin password”. You will be asked to enter and to verify the new Administration password:
After successful change of the password you see this dialog: