Mausoleum
Cohorts
In brief
Mouse cohorts are groups of mice which you want to group together according to any criteria you like. The mouse cohorts give you the opportunity to check what happened to this mouse group after whatever timespan even if the animals are already dead. The mice which are members of a cohort don't need to be relatives or connected by any other attribute. You can e. g. group mice in a cohort because they got a special treatment.
Mice can be members of several cohorts. You can always see the cohorts the mouse belongs to or which mice belong to given cohort. Membership to a cohort can be inheritable. Inheritance is an attribute of a cohort and therefore you can create different cohorts where membership in one is inheritable whereas it is not in other cohorts.
The Cohort table
By clicking "Cohorts" in the object selection field of the Inspector you will get a window with the table of all actually defined cohorts of the group. The table will be shown in the mouse window:
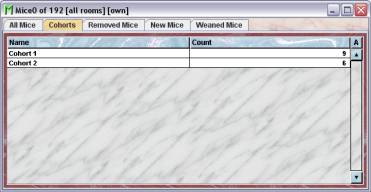
Using the command "Arrange columns" from the context menu (right mouse click in the table) you can specify which attributes of the cohorts should be shown in this table. These attributes are available for the cohort table:
| Column header | Description | Sortable | Filterable | Colorable |
| Color | The color of the cohort | ✓ | ||
| Count | The count of contained objects | ✓ | ||
| Foreign key | Foreign ID from other system | ✓ | ||
| Group | Group name | ✓ | ✓ | |
| ID | The technical ID | ✓ | ||
| Inheritable | indication whether or not membership to the cohort is inheritable | ✓ | ||
| Name | The name of the cohort | ✓ | ||
| end | The end date of the object | ✓ | ||
| start | The start date of the object | ✓ |
In the cohort table a GURU can specify whether only the active cohorts should be displayed in the table or also the inactivated cohorts . To switch between these display modes you use the little "A" button in the top right corner of the table:

If this button is active (pressed) the GURU will see all objects of the group. The active objects are shown in bold whereas inactive objects are shown with in italics.
The Cohort inspector
The cohort inspector is active as soon as the cohort table becomes the active table. It will adopt to the attributes of the selected cohort and lets the user modify the attributes if the user has sufficient privileges to do so. The cohort inspector has two tabs
The "Attributes" tab
Ā
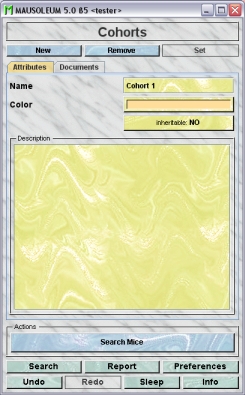
It shows the attributes of the cohort:
- Name:The name of the cohort. It can be changed by the GURU.
- Color: The GURU can assign a color to a cohort. It is very convenient to assign colours such that cohort can be discerned or grouped. Both plain colors and color patterns can be used. A description of the Color choose dialog can be fond here.
- Inheritable: Shows whether or not membership in this cohort is inheritable or not. By clicking this buitton the GURU can invoke a dialog to specify this attribute.
- Description: In this field the GURU can type in a more thorough description of the selected cohort. Remember that you have to use the "Set"-button to transmit the changes in this field to the database. It is not possible to edit the comments if more than one object is selected.
The "Documents" tab
This tab lets you store and exchange documents like pdf- or Word-files with additional informations about the cohorts of your group. In this tab you will find a list with the document which have been uploaded to the server.
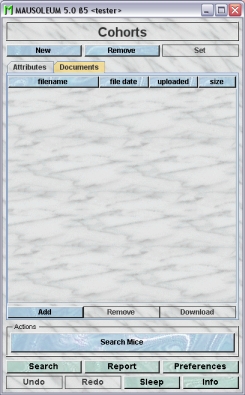
GURUs can add new documents for the selected objects by clicking the "Add"-button beneath the documents list. You will be asked for the location of the document and after congfiming this dialog the file is uploaded top the server and will be displayed in the list. GURUs can also remove documents by selecting one of the documents in the list and clicking the "Remove"-button beneath the documents list. You can download a document and store it on your client computer by clicking the "Download"-button.
The actions
In the "Actions" area of the inspector you find the "Search mice"- button which initiate a serch for the members of the selected cohorts. The resulting mouse table will be shown in a separate window:
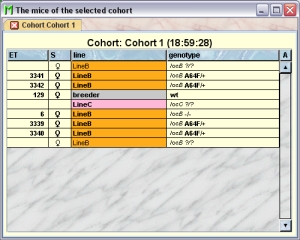
If more than one cohort was selected the mice of each selected cohort will be shown in separate tabs of this window.
Adding Cohorts
A GURU can add new cohorts. To do so select "Cohorts" in the object selection field of the Inspector. After clicking the "New"-button in the inspector you will be asked for the name of the cohort:
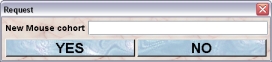
After typing the name of the new cohort you confirm the dialog by clicking "YES" and the new cohort will be created in the database.
Removing Cohorts
Only GURUS can remove cohorts. Removing a cohort will not remove it from the database. It merely becomes invisible to the users and cannot be selected as a cohort for a mouse anymore. But mice belonging to the respective cohort will keep it even if it was removed.
To remove a particular cohort select it in thecohortĀ table and click the "Remove"-button in the cohort inspector. If you answer the security dialog with "YES" the cohort will become invisible.
Reviving Cohorts
The GURU of Group can revive removed cohorts. To do so first you have to make the cohort visible in the owner group table. You can do it using the "A" button in the upper right corner of the table.
Then you have to select the particular cohort and select "Revive object" in the context menu (invoked by right mouse click)
