Mausoleum
Loci
In brief
Loci represent in Mausoleum genetic loci and are the building blocks for the transgenic lines. They are characterized by their name and s to the ENSEMBL and MGI databases can be defined to obtain additional information. Alleles of a locus can be defined from which the genotypes of mice are generated. Only GURUs can add and define loci.
The Locus table
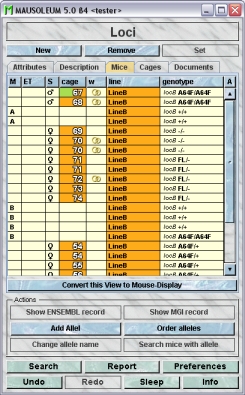
By clicking "Loci" in the object selection field of the Inspector you will get a window with the table of all actually defined loci of the group.
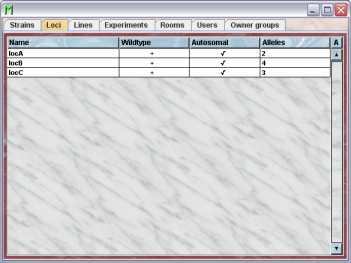
Using the command "Arrange columns" from the context menu (right mouse click in the table) you can specify which attributes of the loci should be shown in this table. These attributes are available for the locus table:
| Column header | Description | Sortable | Filterable | Colorable |
| Alleles | The number of different alleles | ✓ | ||
| Autosomal | Indicates whether this locus is autosomal | ✓ | ✓ | |
| Foreign key | Foreign ID from other system | ✓ | ||
| Group | Group name | ✓ | ✓ | |
| ID | The technical ID | ✓ | ||
| Name | The name of the locus | ✓ | ||
| Wildtype | The wild type allele | ✓ | ✓ | |
| end | The end date of the object | ✓ | ||
| start | The start date of the object | ✓ |
In the locus table a GURU can specify whether only the active loci should be displayed in the table or also the inactivated loci. To switch between these display modes you use the little "A" button in the top right corner of the table:

If this button is active (pressed) the GURU will see all objects of the group. The active objects are shown in bold whereas inactive objects are shown with in italics.
The Locus inspector
The locus inspector is active as soon as the locus table becomes the active table. It will adopt to the attributes of the selected locus and lets the user modify the attributes if the user has sufficient privileges to do so. The locus inspector has five tabs
The "Attributes" tab
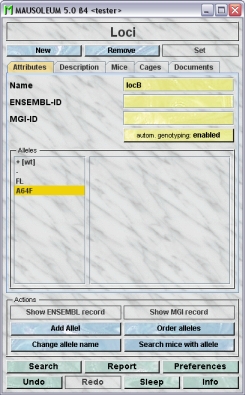
It shows the attributes of the locus:
- Name:It shows the name of the locus which can be edited by GURUs. The space on cage cards is limited. It is therefore wise to make Locus and allel names short. As there are formal rules for naming genes and transgenes, they may be better suited for the description box. For locus name terminology see this document.
- ENSEMBL-ID: Here you can enter the gene-ID as given by the ENSEMBL-project.
- MGI-ID: Here you can enter the gene-ID as given by the Mouse Genome Informatics database of The Jackson Laboratory
- autom. genotyping: Here you can manually override the setting for automatic genotyping for each locus individually. If automatic genotyping is enabled Mausoleum will set the genotype of offspring if its unequivocal. E. g. If both parents are +/+ for a given locus then the pup will also be +/+ for this locus. If the parents are +/+ and -/-for a given locus then the pup wil have the automatically generated genotype +/-. If automatic genotyping is disabled the user has to enter the genotype also in these cases.
The "Description" tab
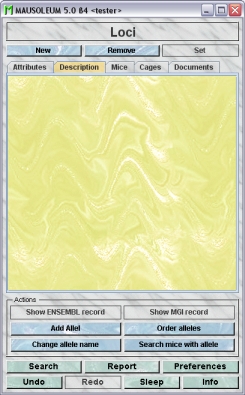
In this tab you can use the text field to enter a more thorough description of the selected locus. Remember that you have to use the "Set"-button to transmit the changes in this field to the database. It is not possible to edit the comments if more than one locus is selected.
The "Mice" tab
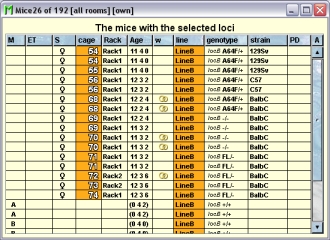
In this tab you see a table with the mice which have a line with one of the selected loci.
Because this table is within the inspector it cannot be used to modify the attributes of the displayed mice. To generated a mouse table which can be used to alter the attributes of the mice you click the button "Convert this view to Mouse display" and a window with a table containing the mice will open:
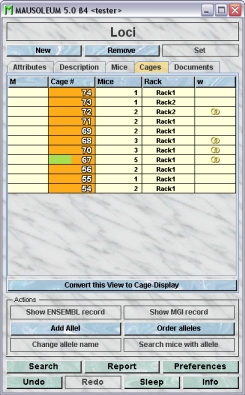
The "Cages" tab
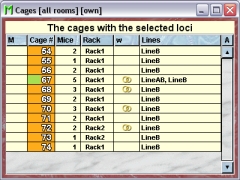
In this tab you see a table with the cages which contain mice which have a line with one of the selected loci.
Because this table is within the inspector it cannot be used to modify the attributes of the displayed cages. To generated a cage table which can be used to alter the attributes of the cages you click the button "Convert this view to Cage display" and a window with a table containg the cages will open:
The "Documents" tab
This tab lets you store and exchange documents like pdf- or Word-files with additional informations about the loci of your group. In this tab you will find a list with the document which have been uploaded to the server.
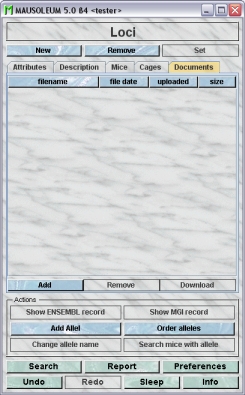
GURUs can add new documents for the selected objects by clicking the "Add"-button beneath the documents list. You will be asked for the location of the document and after congfiming this dialog the file is uploaded top the server and will be displayed in the list. GURUs can also remove documents by selecting one of the documents in the list and clicking the "Remove"-button beneath the documents list. You can download a document and store it on your client computer by clicking the "Download"-button.
The actions
In the "Actions" area of the inspector you find several blue buttons which invoke various actions not directly connected to the attributes of the selected objects:
- Show ENSEMBL record: If an ENSEMBL-ID is defined for the selected locus, a web browser will be opened with the corresponding web-page from the ENSEMBL-project.
- Show MGI record:If an MGI-ID is defined for the selected locus, a web browser will be opened with the corresponding web-page at the Mouse Genome Informatics server of The Jackson Laboratory
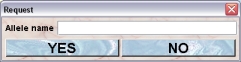
- Add allele: You can always add new alleles but it is not possible to remove alleles later on. For a new allele you just need to specify the name of the allele:
- Order alleles: You can specify the order of the alleles. This will not only determine the order by which they are shon in the inspector but it is the baiss for the order of alleles in the presentation of genotypes. If you have heterozygous mice the allele with the lower rank (more on top of the list) will be shown first. If you click this button a dialog opens which lets you specify the order of the alleles
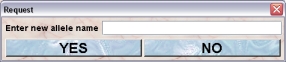
- Change allele name: You can change the name which will be shown for the given allele later on. First you have to select an allele in the allele-list. After clicking thgis button you will be asked for the new name:
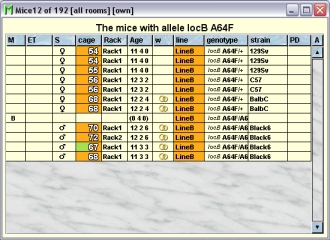
- Search mice with allele: You can search the database for all living mice which have a specific allelel, Therefore you have to select thsi allele in the allele-list After clickcing this button you will get a tabel with all the living mice having thgi s allele.
A GURU, a MASTER or a STUDENT can add alleles to a locus.
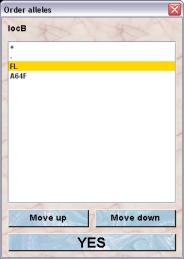
To change the order you select an allele and move it by clicking "Move up" or "Move down" to the desired position.
A GURU, a MASTER or a STUDENT can change the order of alleles.
Adding Loci
Only GURUs can add new loci. To add a locus you click Loci (a list of loci opens) and then New.

The locus should then be named and you can also identify the locus by the name in the ENSEMBL genome sequencing project. There are rules for naming (trans-)genes and genes modified by homologous recombination. See The Jackson Laboratory for a full description or this document for an introduction to correct transgenic names. These are often long and not always informative.
Then decide what you want to call the alleles. + for wt and - for knock out are the defaults. A suggestion for naming loci and alleles can be found here. You can add and remove alleles at this stage using the "Add Allel" or "Remove Allel" buttons.
Defining the wild type is done by selecting one allel in the list and clicking the button "Define as wild type".
The information whther the locus is autosomal or not has to be specified in the checkbox when the locus is cretaed. Sinde this has a profound effect on the possible genotypes it cannot be changed afterwards.
After creating a locus you can select it in the list of loci and add information in the inspector. It may be wise to add the proper gene name in the description box if you abbreviated it earlier.
Removing loci
Only GURUS can remove loci. Removing a locus will not remove it from the database. It merely becomes invisible to the users and cannot be selected for a line anymore. But lines for using the respective locus keep it even if it was removed.
To remove a particular locus select it in the locus table and click the "Remove"-button in the locus inspector. If you answer the security dialog with "YES" the locus will become invisible.
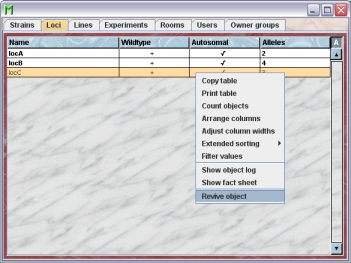
Reviving loci
The GURU of Group can revive removed loci. To do so first you have to make the locus visible in the locus table. You can do it using the "A" button in the upper right corner of the table.
Then you have to select the particular locus and select "Revive object" in the context menu (invoked by right mouse click)