Mausoleum
Racks
In brief
Racks are in a normal clients not shown as a table. They are displayed in a special window where you find a graphical represenation of the rack and the cages within that rack. There are also tables with the cages in the cureently displayed rack and the cages which are at the moment not located in a rack as well as a table for the mice in the selected cages. From the rack window you can bring up the rack overview which shows a miniature display for all the racks of your group.
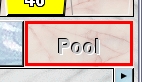
The mice and cages can be transferred using simple drag and drop gestures. If necessary, cages will be created automatically. In the rack window there is also the pool area for mice and cages. This pool is no physical location it is rather comparable to shopping carts in online shops where you store items for later use.
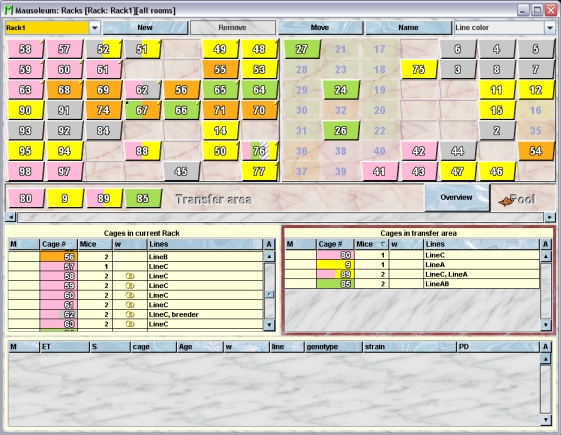
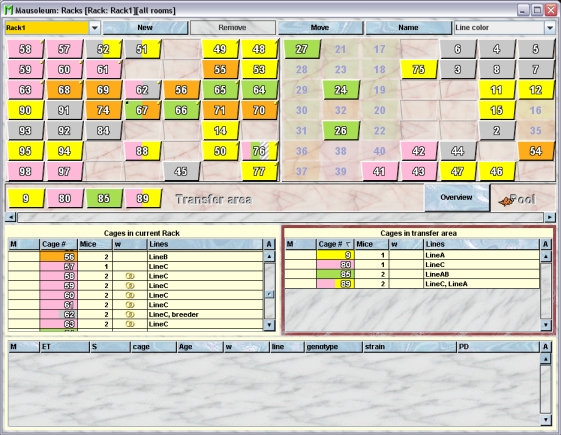
The rack window
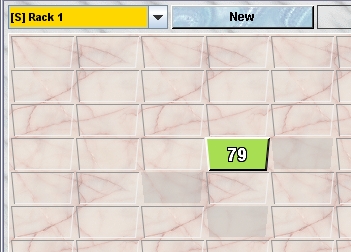
The main part of the window is occupied by a graphical represenation of the actually selected rack. You see in two fields (if applicable) the front and back side of the rack with the cages which are located in that rack.
In the topleft corner you select which rack you want to look at. The names of the racks are shown. in the selection field and the racks wich are shared between groups and under the supervision odf the service group are shown with an "[S]" in fornt of the rack name. Nobody except the head of the service group can change the name or location of these racks.
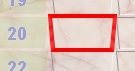
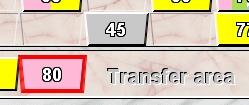
Immediately below the graphic representation of the current rack, cages in the transfer area are shown. These are available cages not currently placed in a rack. They could for instance represent empty cages to be used at a later stage or animals that are temporarily moved to another room for examinations. It is also a convenient temporary storage if cages are to be placed in a different rack. The transfer area stays the same when changing racks.
Below the transfer area are two cage tables showing cages in the current rack (left) and in the transfer area (right). These tables act like normal cage tables as described here.There is only difference for the left table with the cages of the current rack. Selection of cages in this table will cause the respective cages to b in the rack display. Also will clicking on one of the cages to a selection in the left cage table.
The mouse table at the bottom of this window shows the mice in the currently selected cages. These tables act like normal cage tables as described here. In the mouse and cage tables you can specify whether you want to see all objects of the group or only the objects you own. To switch between these display modes you use the little "A" button in top right corner of the table:

If this button is active (pressed) you will see all objects of the group. Your own objects are shown in black whereas objects owned by other users are shown with a blue font color.
The display size of the cages depends on the horizontal size of the window and vice versa. This means: if you change to a rack with a different size the window will adapt in size to the number of rows and coulmns of the selected rack keeping the display size of the cages constant. On the other hand if you resize the window horizontally the display size of the cages will change. Reducing the width of teh window will therefore shrink the whole rack display as shown here with the same rack as above after a horizontal resize:
Vertical resizing however will not change the display size of the cages. It rather will change the size of the mouse table at the bottom of the window. Here you see the same window as above is shown after vertical reisze:
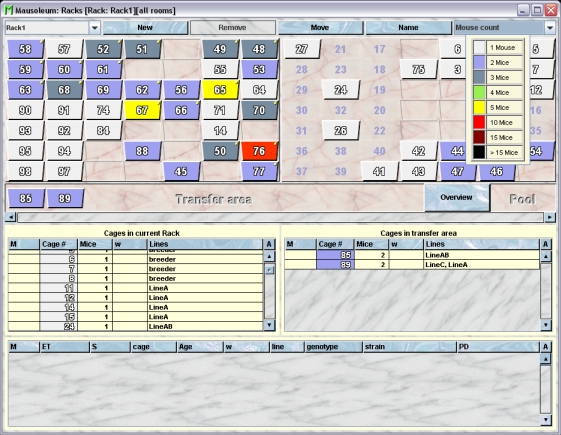
The selection box at the top right is used to select the color mode for the cages to extract information on their features. A more detailed description of the available color modes can be found here. You will get a tooltip while your mouse pointer is over this selection field describing the currently selected color mode.
Cages from other groups in a shared rack
If the rack is shared between different group (for detailed description see here), certain spots in the rack can be occupied by cages from other groups In Mausoleum you cannot peek into these cages but you can clearly see that the spots in the rack are occupied. The respectove spots are marked as block by a grey color:
Thes spots are marked as occupied and you can drag neither mice nor cages there. The other groups who share this rack with your group will have the same picture for your cages. As soon as these cages are moved the other groups sharing this rack get notified and the display adapts to the new situation.
Rack overview
To the right of the transfer area there is the rack overview button. Clicking this buttons opens a window showing a miniature image of the racks painted with the same color mode as the current rack. Also here yoi can select the desired color mode. The color mode in the rack window and the rack overview will be always the same. Selecting one of the racks in the rack overview will select the rack in the rack window.
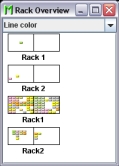
Also here you can select the desired color mode. The color mode in the rack window and the rack overview will be always the same. Selecting one of the racks in the rack overview will select the rack in the rack window.
Drag and drop support
MIce and cages are moved in the rack window by simple drag and drop. You can select a mouse or cage in a table or in the rack representation (only cages) and drag it to desired position. While dragging the the mouse pointer adapts the shape to the dragged objects. If you drag your mousepointer to a spot where the dragged objects can be put you see a thick red border around this spot. Releasing the mouse button will move the mouse or cage to this position.
in case of a real transfer of mice you will be asked for a date for that transfer. It is very important to note that you should be very careful with these dates. The dates of visits are used later for determination of fatherhood of litters or breeding performances. Also cage mates can be only determined if the dates of entry and leave are precisely defined.
Dragging cages
A single cage can be dragged to an emtpy spot in the rack representation. It cannot be moved to a position which is already ovccupied.

A single cage and also more cages can be dragged to the transfer area.

You can also drag cages to the Pool area which is not really a transfer. It only collects cages or mice for a later treatment like you are used to from shopping carts in online shops.
Dragging mice
Mice can be dragged to existing cages if they belong to your group and not to another group which shares the same rack with your group.

Mice can be also be dragged to empty süots in the rack representation. If you drop them here, a new cage will be created automatically.
Cages in the transfer area are also a suitable target for dragging mice.
You can also drag the mice into the transfer area if you drag your mouse pointer to spot within the transfer area but not on top of a cage therein. Also here a new cage will be created automatically if you drop the mice.

You can also drag mice to the pool area which is not really a transfer. It only collects cages or mice for a later treatment like you are used to from shopping carts in online shops.
The Mausoleum pool for mice and cages
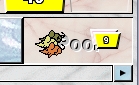
The pool area in the Rack window can be used like the shopping carts in online shops. You can simply drag mice and cages and drop them in to this field. Nothing will happen to them they will be only collected. The actual contens of the pool is symbolized by small icons:
Using the context menu in the pool area (invoked by right mouse click) you can invoke two actions:
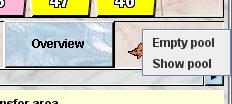
- Empty pool: This wil empty the pool removing all mice and cages you put in.
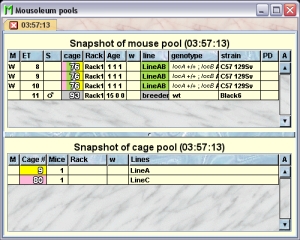
- Show pool: Selecting this item will bring up the window with the pool snapshots. Here you find in the last tab the actual contents of the Mausoleum pool. This table will stay there unless you remove the tab. This makes it possible to collect different subsets in the pool. To do so you drag the objects into the pool area, select "Show pool" in the context menu and "Empty pool" thereafter. Now the pool is empty and you can collect the next subset. The collections will stay in this window.
There is alternative way to move mice in to the pool. In all mouse tables you have items for handling the Mausoleum pool in the context menu which you get using the right mouse button.

The context menu allows these actions:
- Add to pool:Adds the select mice to the Mausoelum pool.
- Remove from mouse pool: Removes the selected mice from the Mausoleum pool if possible.
- Empty pool:This wil empty the pool removing all mice and cages you put in.
- Show pool:Selecting this item will bring up the window with the pool snapshots as described above.
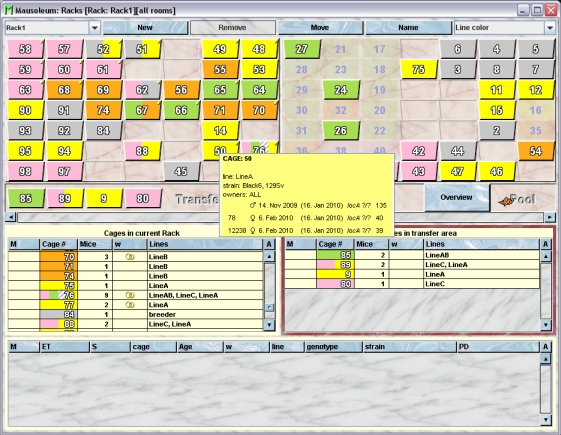
Cage tooltips
If the use of tooltips is set to "On" in the Preferences you will get a tooltip when you move your mouse pointer over a cage. The basic tooltip is a little table describing the contents of the cage:
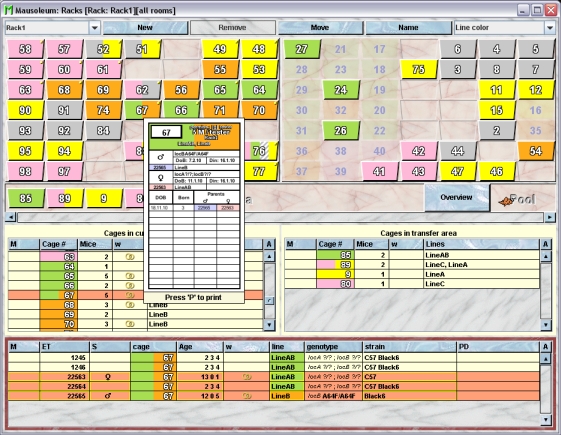
But you can also get a cage card as it would be printed using your default cage card printer. This can be specified also in the Preferences. In addition you can specify the zoom size of the cage card shown as tooltip.
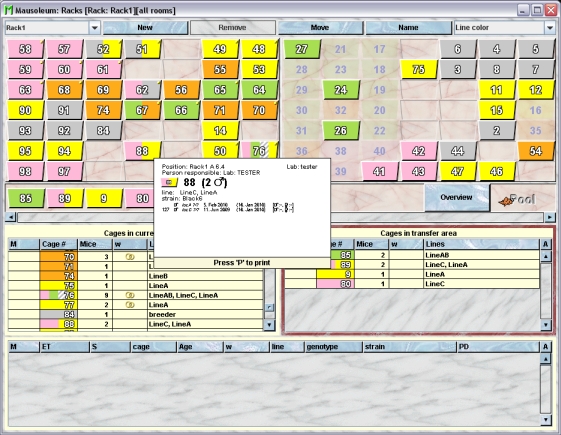
If you press the "P"-key while this tootip is shown the cage is printed directly. After a change of the default cage card printer also the appearance of this tooltip changes:
Display of own and foreign cages
You can specify in several modes how your own and foreign cages from your group are distinguished. You can set that mode in the Preferences dialog described here. The icons dcan differ in border color intensity and the display of the cage number. As an exmaple you see here own and foreiign cages using the mask mode "Mask all"
The same cages are shown now using the mask mode "Mask nothing":
Highlight marked and mating cages
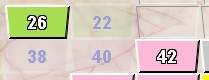
Breeding cages are always identifiable by a small golden spot on the upper right corner of the cage symbol (in the example: cage 62 and 67) except when the color mode "Mating" is chosen. Cages with a mark (the standard pointer or single letter in cage tables) are shown with a little black spot in the upper left corner of the cage symbol (in the example: cage 67).
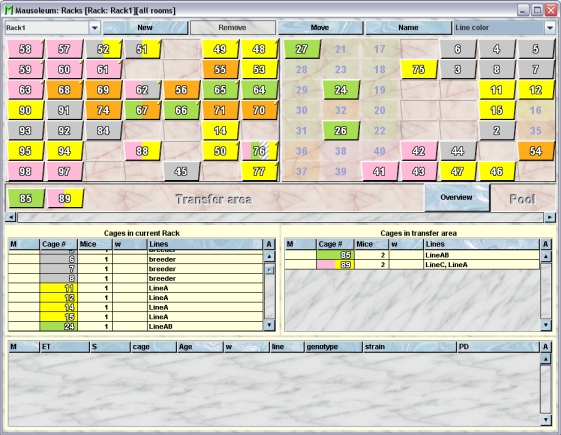
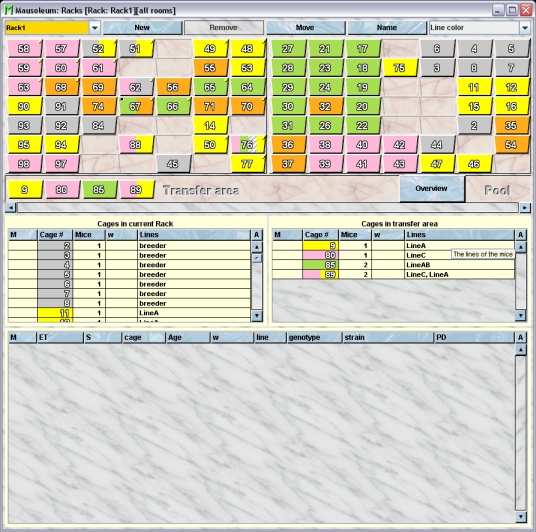
Order of cages in the transfer area
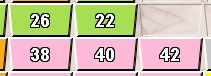
The order in which the cages in the transfer area from left to right are shown reflects the order of these cages in the corresponding right cage table from top to bottom. In this exmaple the cages are sorted by the mouse count.
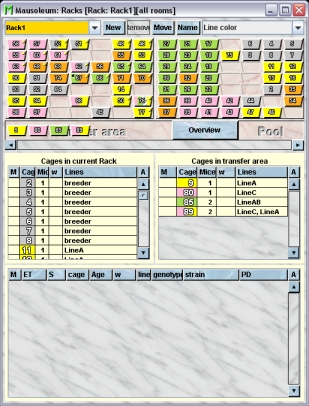
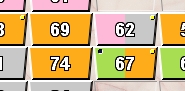
If you sort them according to the cage number not only the order in the table but also in the transfer area changed:
Creating a new rack
Only the GURU of a group can add new Racks. Rack s which are created from a GURU of the group can be used from users of the group without any problem but they cannot be shared with other groups. If you share racks and rooms with other groups it is preferable not to create proprietary racks. Rather let the head of the service group create the racks. Clicking the blue "New"-button on top of the rack window brings up a dialog in which you are asked for the name and the dimensions of the rack:
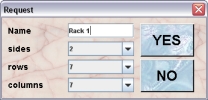
You are neither allowed to set an empty name (“”) nor to use a name which is already given to another rack. For the dimensions of the rack you have here the following options
- sides: 1 for single- or 2 for double-sided racks
- rows: 4 to 15
- columns: 4 to 15
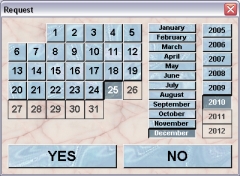
Clicking “YES” brings up the dialog which lets you specify the date when this rack was added to the group.
Clicking “YES” adds rthe new rack to your group.
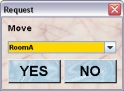
Specifying the location of a a rack
The GURU can specify the room where the rack is located. This is only possible if the selected rack is not shared with other groups. If that's the case the location of the rack can only be specified by the head of the service unit. You can specify the location of the selected rack by clicking the "Move"-button. If you select the room of teh rack in the next dialog and click "YES" the new name is set in the database.
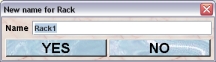
Renaming a rack
The GURU can change the name of a the rack. This is only possible if the selected rack is not shared with other groups. If that's the case the name of the rack can only be changed by the head of the service unit. You can specify the new name of the selected rack by clicking the "Name"-button. If you enter the new name in the next dialog and click "YES" the new name is set in the database.
Removing a rack
The GURU can remove empty racks. This is only possible if the selected rack is not shared with other groups. If that's the case the rack can only be removed by the head of the service unit. Clicking the blue "Remove"-button on top of the rack window brings up a dialog in which you are asked for the date of the removal:
Selecting the approriate date and clicking “YES” removes the rack from your group.