Mausoleum
Licenses
In brief
The licenses represent legal licenses which allow to keep and to work with a specified number of mice. Mice can be assigned to a valid license and you will always keep track how much of the license is used up and how many mice can still be used in your lab.
Assignment of mice to a license can be restricted to a defined set of users.
The License table
After clicking "Licenses" in the object selection field of the inspector you will get the table with all active licenses.

Using the command "Arrange columns" from the context menu (right mouse click in the table) you can specify which attributes of the loci should be shown in this table. These attributes are available for the license table:
| Column header | Description | Sortable | Filterable | Colorable |
| Begin of validity | Date from which the license is valid | ✓ | ||
| Expiry date | Date until which the license is valid | ✓ | ||
| Foreign key | Foreign ID from other system | ✓ | ||
| Group | Group name | ✓ | ✓ | |
| ID | The technical ID | ✓ | ||
| License holder | The holder of the license | ✓ | ||
| License-ID | The ID or name of the license | ✓ | ||
| Users | Name of users with permission for this license | ✓ | ||
| act. mice | Actual number of mice registered for this license | ✓ | ||
| color | The color of the license | ✓ | ||
| comment | The comment for this License | ✓ | ||
| died | Number of died mice | ✓ | ||
| end | The end date of the object | ✓ | ||
| exported | Number of exported mice | ✓ | ||
| max. mice | Maximum of mice covered by this license | ✓ | ||
| rem. mice | Remaining number of mice for this license | ✓ | ||
| sacrificed | Number of sacrificed mice | ✓ | ||
| start | The start date of the object | ✓ |
In the license table a GURU can specify whether only the active licenses should be displayed in the table or also the inactivated licenses. To switch between these display modes you use the little "A" button in the top right corner of the table:

If this button is active (pressed) the GURU will see all objects of the group. The active objects are shown in bold whereas inactive objects are shown with in italics.
The License inspector
The license inspector is active as soon as the license table becomes the active table. It will adopt to the attributes of the selected license and lets the user modify the attributes if the user has sufficient privileges to do so. The license inspector has five tabs
The "Attributes" tab
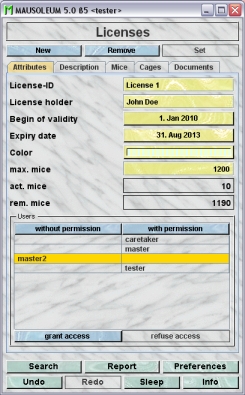
It shows the attributes of the license:
- License-ID:The name or official ID of the selected license.
- License holder: The proper name of the official holder of the selected license-
- Begin of validity: The date at which the selected license became valid and mice can be assigned to.
- Expiry date: The date at which the selected license becomes invalid and mice cannot be assigned to any longer.
- Color:The GURU can assign a color to a licnese. Both plain colors and color patterns can be used. A description of the Color choose dialog can be fond here.
- max mice: In this field you can see end edit the number of mice which are granted by the seleted license. Only the GURU can change that number. Nevertheless it shouldn't change. If this number is changed you will get a mouse pope alert.
- act. mice: Shows the number of mice which have been registered to this license. It cannot be changed here. This number changes whenever mice are added to the respective license automatically.
- rem. mice: Shows how many mice can still be registered to this license until the maximum number is reached. It cannot be changed here. This number changes whenever mice are added to the respective license automatically.
- Users: In this table you see all users of this group listed who potentially could assign mice to this license. Potential users are GURUs, MASTERs and CARETAKERs. GURUs and CARETAKERs can always register every mouse to a licenseĀ For MASTERs the access to the selected licenses can be granted or refused using the buttons "grant access" and "refuse access".
The "Description" tab
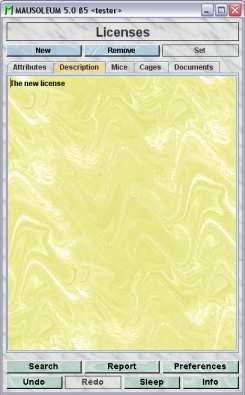
In this tab you can use the text field to enter a more thorough description of the selected license. Remember that you have to use the "Set"-button to transmit the changes in this field to the database. It is not possible to edit the comments if more than one license is selected.
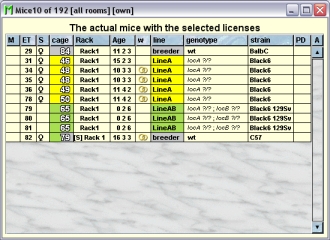
The "Mice" tab
In this tab you see a table with the mice which belong to one of the selected licenses.

Because this table is within the inspector it cannot be used to modify the attributes of the displayed mice. To generated a mouse table which can be used to alter the attributes of the mice you click the button "Convert this view to Mouse display" and a window with a table containg the mice will open:
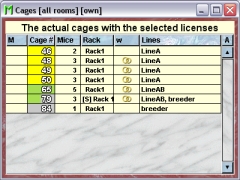
The "Cages" tab
In this tab you see a table with the cages which contain mice which belong to one of the selected licenses.

Because this table is within the inspector it cannot be used to modify the attributes of the displayed cages. To generated a cage table which can be used to alter the attributes of the cages you click the button "Convert this view to Cage display" and a window with a table containg the cages will open:
The "Documents" tab
This tab lets you store and exchange documents like pdf- or Word-files with additional informations about the licenses of your group. In this tab you will find a list with the document which have been uploaded to the server.
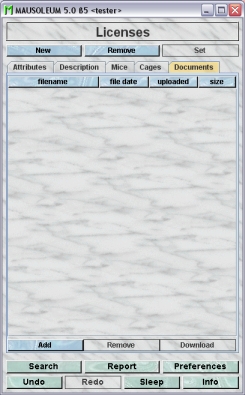
GURUs can add new documents for the selected objects by clicking the "Add"-button beneath the documents list. You will be asked for the location of the document and after congfiming this dialog the file is uploaded top the server and will be displayed in the list. GURUs can also remove documents by selecting one of the documents in the list and clicking the "Remove"-button beneath the documents list. You can download a document and store it on your client computer by clicking the "Download"-button.
Adding Licenses
Only GURUs can add new licenses. To add a license you click on "Licenses" in the object seleciion field of the inspector. After clicking "New" in the license inspector you can specify the attributes of the new license.

Enter the name or official License-ID and the proper name of the official license holder. You set the dates by clicking the little "..."-button at the right side of the respective field. You will get a dialog for selecting the date:

Type in the maximum number of mice granted by the new license. You can set a color for this license by clicking the little "..."-button at the right side of the respective field. Both plain colors and color patterns can be used. A description of the Color choose dialog can be fond <;25>here.
Ath the right side of the dialog you find a list of the MASTER user of your group. GURUs and CARETAKERs can always register every mouse to a licenseĀ For MASTERs the access to the selected licenses can be granted or refused. Grant or refuse access to a MASTER user by clicking on the name. Users who are allowed to use this license are shown with a checkmark in front of their name.
You can type in a description of the license in the big text field at the bottom of the dialog.
Removing licenses
Only GURUS can remove licenses. Removing a license will not remove it from the database. It merely becomes invisible to the users and cannot be selected for a mouse anymore. But mice assigned to this license keep it even if it was removed.
To remove a particular license select it in the license table and click the "Remove"-button in the license inspector. If you answer the security dialog with "YES" the license will become invisible.
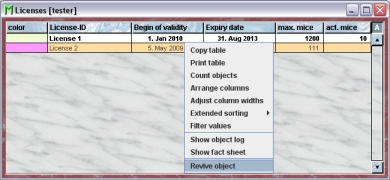
Reviving licenses
The GURU of Group can revive removed licenses. To do so first you have to make the license visible in the license table. You can do it using the "A" button in the upper right corner of the table.
Then you have to select the particular license and select "Revive object" in the context menu (invoked by right mouse click)
Registering mice
If licenses are defined you can register mice for a specific licenses if your privileges are sufficient and you are allowed to set a specific license (see above). In oreder to do register mice to a sepcific license you select the repsctive mice in a mouse table and click in the "Attributes"-tab of the mouse inspector the "License"-button:
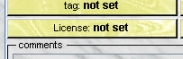
A dialog will appear allowing you to set or to clear the license for the selected mice. You have the choice between the active licenses of the group. This choice will be presented as dropdown list or as buttons if less than 5 items are available.
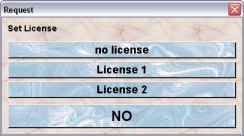
You can also select "no license" indicating that this mouse will not be counted for any legal license.
Ā